10 Easy to Grow Vegetables
As with all new projects gardening can be very overwhelming especially if you are a complete beginner. How can you decide what vegetables to grow?
Start by listing all vegetables that you and your family like to eat. Look through this list of 10 easy to grow vegetables and shortlist which ones you can start with this season.
This list is based on my experience in Sweden, zone 7a. We have quite mild winters and a lot of rain in all seasons.
The list includes: 1) radishes, 2) green salad leaves, 3) peas, 4) potatoes, 5) zucchini, 6) pumpkin, 7) beetroot, 8) kale, 9) garlic, 10) rhubarb.
RADISHES
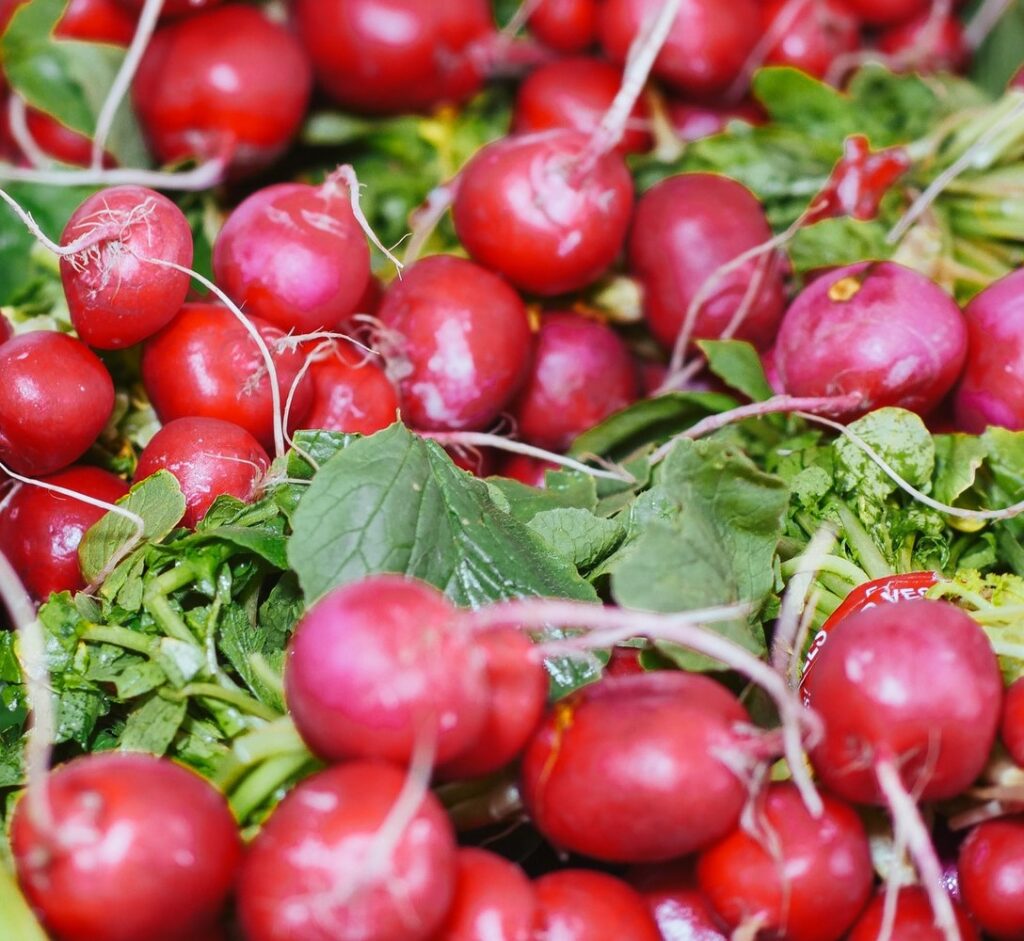
Sow: Early spring (April) until late summer
Sow to Harvest: 25-30 days
Radishes are one of the fastest and earliest vegetables to grow outdoor. It takes just three to four weeks to reach harvest time.
Radishes grow best in cool moist weather (seeds germinate best at 55-75ºF/ 12-24ºC). They prefer light, sandy loams with pH 6.5-7.0, but will tolerate a wide range of soil types. Sow the seeds direct into prepared ground. Sow the seeds very thinly, spacing them about one inch (2.5cm) apart. They should be planted ½ inch (1-1.5 cm) deep.
Sow small batches every few weeks until the very end of summer. This will give you a continuous crop throughout the summer.
Radishes need full sun conditions. Too much shade, and they’ll put all of their energy into producing leaves instead of the roots. Be sure your radishes get at least eight hours of sun.
Seedlings will pop up within 3-5 days. If necessary, thin the seedlings (remove the seedlings which are too close to each other leaving the strongest to grow) so the roots have enough room to expand.
Keep the ground free of weeds, and water in dry weather. Harvest the radishes before they get too large, otherwise they can turn woody in texture and become overpoweringly hot.
GREEN SALAD LEAVES
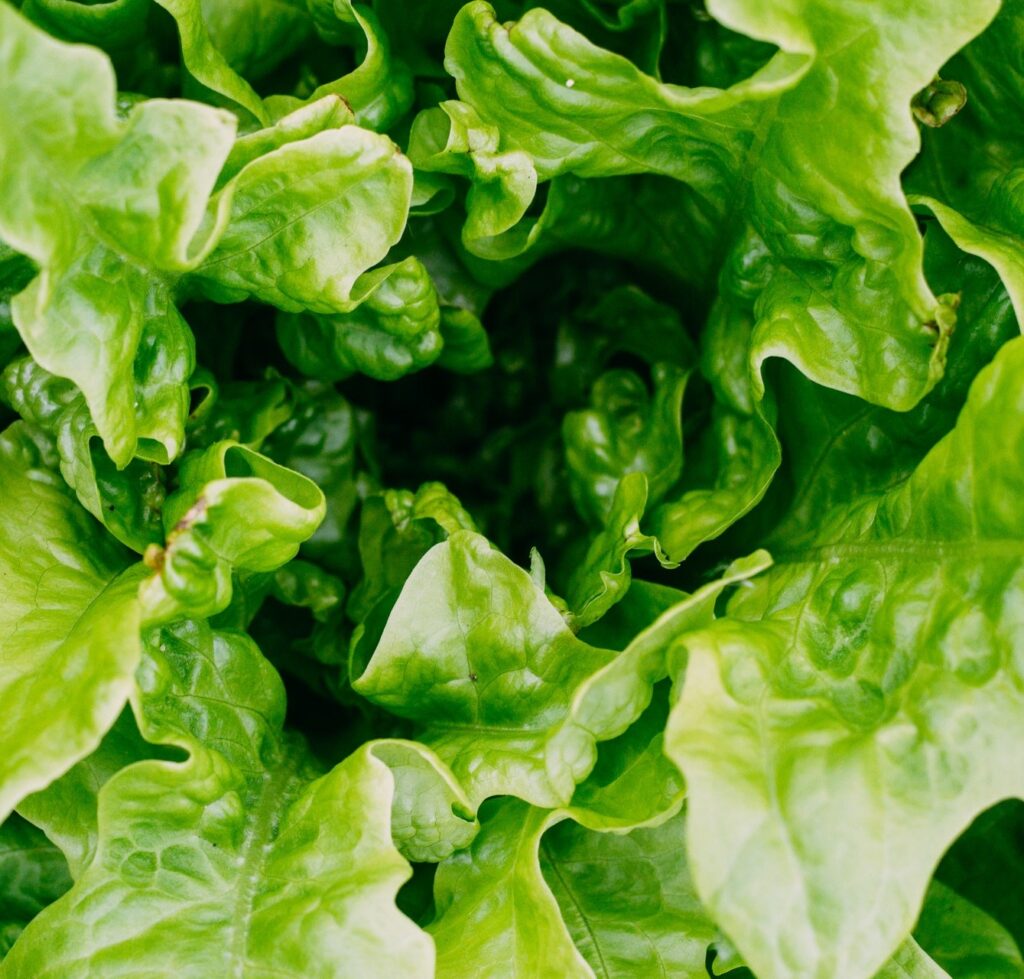
Sow: Early Spring
Sow to Harvest: 21 days
To make any salad more exciting and full of flavour it’s best to mix in a few different types of salad leaves. They are very easy to grow in your own garden.
You can choose from two ways:
- create your own salad blend by mixing two or more seed varieties together before sowing in the ground.
- sow each seed type separately. I usually prefer the latter.
Suitable salads include Romaine lettuce, mustards, spinach, ruccola (aka arugula or rocket), Swiss chard, mizuna and other Oriental leaves.
Sow the seeds very thinly into rows spaced 6-10in (15 – 25cm) apart. Cover the seeds with soil, then gently pat the surface of the soil down. Water the roots (not the leaves) along the rows then keep the soil moist and weed free as the seedlings grow.
Leafy greens grow best in rich, loamy soil that contains plenty of organic matter. Before you sow or plant out your seedlings, use a trowel or hand fork to dig some compost into the top couple inches of soil. Seedlings benefit from being watered right after transplanting with a weak solution of seaweed/fish emulsion.
Lettuce and other salad greens are shallow-rooted and grow rapidly. They need continuous access to lots of water to produce tender, succulent leaves. Keep the soil consistently moist so the plants don’t get stressed. If your summers are hot and dry, invest in a soaker hose or dripper line.
I find that the most convenient way to harvest the green leaves is with scissors. Most greens will re-grow after cutting, as long as you leave about a half inch of plant behind.
Tips:
Swiss chard is a biennial. Weather permitting, you can keep your Swiss chard in your garden for two full years.
Mizuna is vigorous, cold-resistant, and easy to grow in most soils. It is very decorative so you can grow mizuna near the edges of your other beds.
Spinach is an incredibly fast grower. Plant it successively to have constant supply at your table.
Romaine is very heat tolerant compared to other green leaves.
Mustard Greens come in all sorts of varieties from red to green, and loose-leaf to headed. Loose-leaf types mature in 45 days and heading types mature in 60-75 days. All varieties perform well in heat and a light frost, making them easy to grow.
PEAS
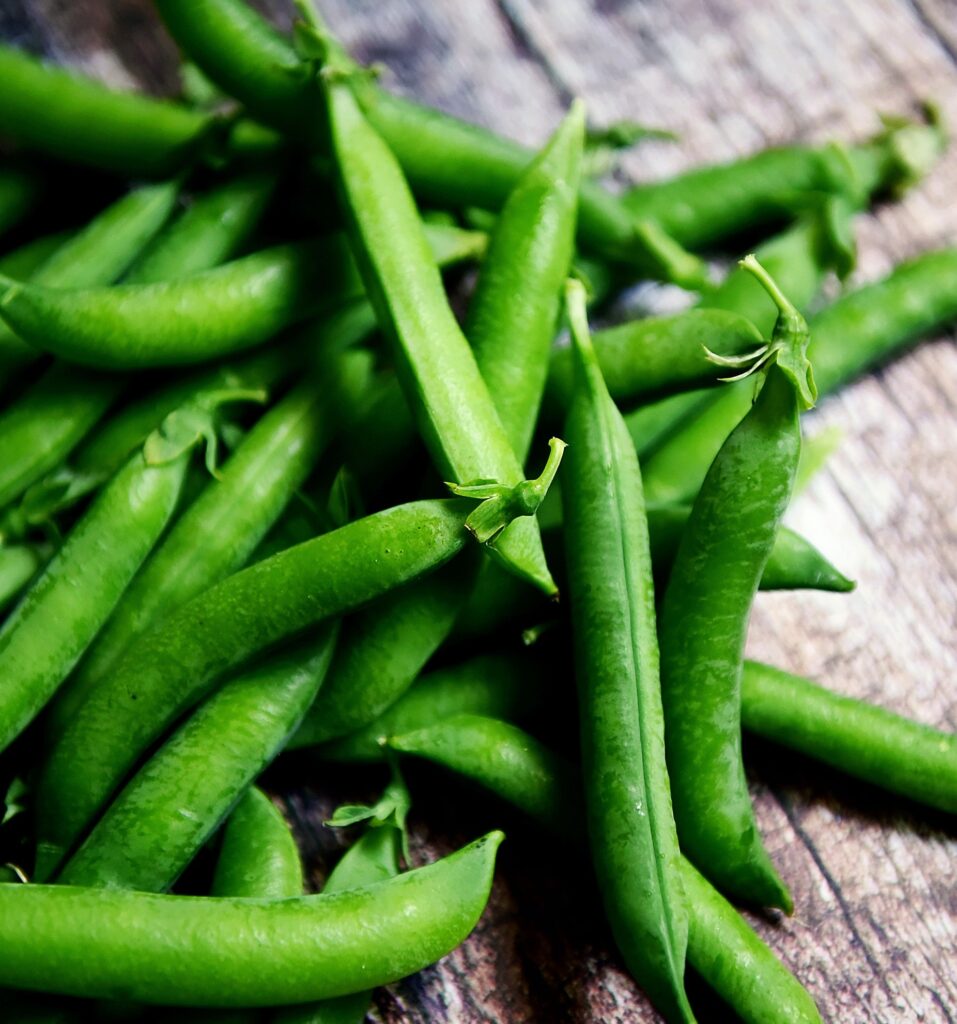
Sow: 6-8 weeks before the last frost date between March and early July. In the late summer or early fall 6-8 weeks before your first fall frost date.
Sow to Harvest: 60-70 days
Peas really do not like to have their roots disturbed, so it’s best to plant peas from seeds direct into the ground where they are going to grow. However, if you do live in an area with a particularly cold and wet spring, starting pea seedlings indoors might be a better idea. Just be very careful to not disturb the roots when transplanting.
Peas prefer sandy or loamy soil with good drainage, but they will grow in most soils except the heaviest of clays. Peas prefer slightly acidic soil, with a soil pH level of 6.0-7.0.
Choose a sunny spot. While peas can grow in part shade, they won’t be as sweet or productive as those grown in full sun. Dig in plenty of garden compost, well-rotted manure or mushroom compost before sowing to improve the soil.
To speed germination, soak seeds in water overnight before planting.
Use a hoe or spade to make a shallow trench, 7-10in (20-25cm) wide and 1in (3cm) deep. Sow peas in two parallel lines, spacing the seeds about 2-3in (7-10cm) apart. Peas like to be a little crowded! Cover the seeds with soil and water well. Poke in any seeds that get pushed up out of the soil during the germination period. The seedlings should appear in one or two weeks.
Keep the weeds away, make sure to use gentle weed removal (like a sharp hoe) to remove weeds instead of pulling, for fear of disturbing the pea roots.
Peas climb using shoots called tendrils, so put supports in place while they’re still young. You can use wooden or bamboo sticks, metal rods, nets or ropes.
Peas produce best when the temperature stays below 70ºF (21ºC). If it is warmer than that, production will slow down and it will be tough to get your harvest.
Peas mature quickly, so check daily once you see the flowers in bloom. Pick snow peas when the delicate pods begin to show immature seeds inside. Gather snap peas when the pods become plump yet are still glossy and filled with sweet-tasting peas. Pick shell peas before the pods become waxy.
Peas make an excellent companion plant for smaller garden plants that could use a boost of nitrogen and enjoy the shade provided from the tall pea vines. Spinach, lettuce, and radishes are great options to plant under pea plants.
Peas also grow well some strongly aromatic herbs and flowers, like cilantro, mint, sage, thyme, and marigold. These can help prevent aphid and other insect infestations in peas.
Tips:
Do NOT plant peas in the same place more than once in every four years. Rotate crops.
Peas need phosphorus and potassium, but excess nitrogen will encourage foliage growth instead of flowers or pods.
As with other legumes, pea roots will fix nitrogen in the soil, making it available for other plants.
POTATOES
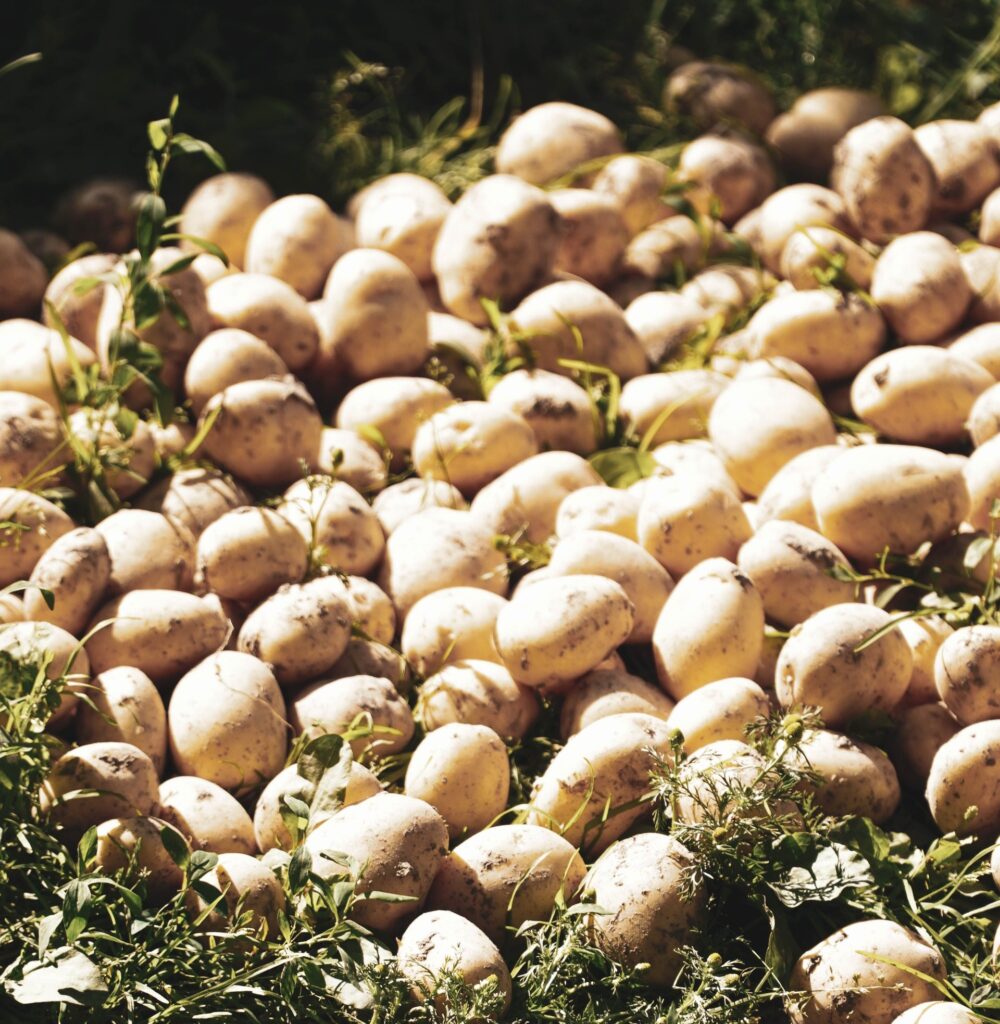
Plant: Early spring, 3-4 weeks prior to your last frost date
Plant to Harvest: 10 weeks for small new potatoes and 80-100 days for maincrops.
Before you plant you need to decide what type of potato you need. There are two main types of potato: maincrops and earlies.
Maincrop varieties are usually bulkier and give a bigger harvest, and many can be stored for winter use. Maincrops are typically harvested in late summer or even autumn in some regions.
Early varieties are ready from early to midsummer. Early potatoes tend to be smaller than maincrop types, but they taste absolutely delicious.
You’ll need some seed or sprouting potatoes for planting, also sold as simply ‘tubers’. Cut large seed potatoes into smaller pieces with at least two ‘eyes’ and allow the cut to air dry for a day before planting. Potatoes that are smaller than a hen’s egg should be planted whole.
You can seed potatoes at home. Do this up to six weeks ahead of planting. Get potatoes from farms or save some from your last year’s crop. Lay them out in a single layer into trays or old egg cartons, so the ends with most eyes face up. Keep them in a cool, bright place to sprout thick, sturdy shoots.
Potatoes love full sun location and rich, moist, well-drained, sandy loam, slightly acidic soil (5.8-6.5 pH). If your soil drains poorly or is heavy clay, then consider using raised beds or growing potatoes in containers. Add fertilizer or composted manure for best results. The soil, not the calendar, will tell you when it’s time to plant. The temperature of the soil should ideally be at least 50°F / 10°C. The soil should also not be so wet that it sticks together and is hard to work. Let it dry out a bit first. Like other seeds, potato seed pieces will rot if planted in ground that’s too wet.
Plant early potatoes first. Follow with maincrops a couple of weeks later. Plant potato segments cut-side down (eyes up) in a 6in (15cm) deep hole or trench. Space each segment 12in (25cm) apart on all sides. You can sprinkle 2 tablespoons of a low-nitrogen, high-phosphorous fertilizer between each segment. Then cover both potatoes and fertilizer with 2in of soil, and water well.
Shoots should poke above ground within about two to three weeks. They’ll tolerate very light frosts but should be covered over with row cover if something colder is forecast.
Once they reach 6in (15cm) tall start hilling your potatoes. Use a hoe to draw up the surrounding soil around the shoots, leaving the very tops exposed. Hill again when potato plants grow another 6in (15cm). The more you hill, the more prolific your harvest is likely to be. Stop hilling when the plants start to flower.
Remove weeds early on. Potatoes need ample moisture, water them thoroughly in dry weather to enable tubers to grow to their full potential.
You can harvest early potatoes as soon as the plants begin to flower a couple of months after planting. Continue harvesting early varieties in stages from this point on, leaving the remaining plants to grow on until needed.
Maincrop potatoes are usually harvested towards the end of summer or in early autumn once the foliage has died back. Harvest on a dry day, lift them up with a fork, taking care not to accidentally pierce any of the tubers. Brush off excess soil, let the potatoes air dry for a few hours then store out of the light in a cool but frost-free place.
Here are some companion planting options. Beans can improve the size of potato tubers. Cilantro protects against aphids, spider mites and potato beetles. Calendula and horseradish planted at the corner of a potato patch wards off Colorado potato beetles. Catmint also repels Colorado potato beetles, but can attract cats into the vegetable garden, so it is a good idea to plant it in pots around the edge of the plot.
Tips:
Don’t wash harvested potatoes until right before you use them. Washing potatoes shortens their storage life.
Do not put potatoes near apples; the apples’ ethylene gas will cause potatoes to spoil and go bad.
For long-term storage, potatoes need the following conditions: ventilation, cool temperatures, high humidity, and no light. You can store them in an unheated entrance, spare room, closet, attic, cabinet, basement, or garage insulated to protect potatoes from freezing.
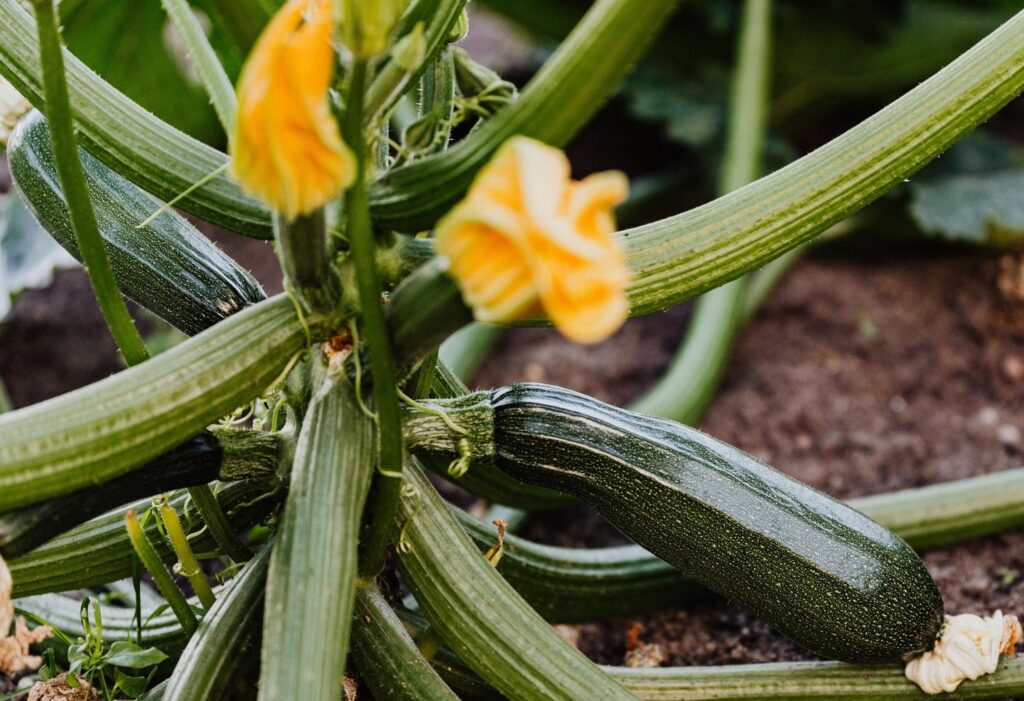
ZUCCHINI
Sow: Spring when the danger of frost is gone.
Sow to Harvest: 40-90 days
Zucchini is extremely easy to grow from seed. As zucchini does not tolerate frost or cold temperatures, you can start from seeds indoor early spring. Wait until at least mid-spring before you plant outdoor when the soil warms, depending on your climate. The danger of frost should be completely gone, and the temperature should be reliably above 60°F / 15°C.
Zucchini plants like well-drained soil enriched with plenty of compost. Space single plants 1′ 11″ (60cm) each way (minimum). Sow seeds 1in (2.5 cm) deep, either in rows or hills. Hilling gives the plants an extra boost of nutrients they’ll appreciate. Choose a sunny location and make sure plants receive an inch of water per week.
You can feed zucchini plants with a liquid fertilizer when they begin to blossom and set fruits.
New zucchini plants tend to produce a lot of male flowers at first. The male flowers are there strictly for pollinating purposes, they do not produce zucchini. Be patient. Once the plants mature a little, they will start setting flowers of both sexes. You will know you have female flowers when you see tiny fruits directly behind the base of the flower.
You can always take pollinating matters into your own hands. You can remove the male flowers and dust their pollen onto the female flowers to help ensure good pollination takes place. You can also use an artist’s paintbrush to transfer pollen from the male flower on the female bloom. Moreover, don’t waste those early male flowers. You can still pick them, dip them in batter, and fry them up for a great treat.
Harvest zucchini when they are young and tender, about 6in (15cm) long, before the rinds begin to harden. Use a knife to cut fruits from the plants.
Squash bugs and squash vine borers can be serious pests. Exclude them from young plantings with row covers. Buckwheat brings in pest predators which reduce insect pests.
Tips:
Good companions are oregano and zinnias as they attract pollinators. Nasturtium protects against aphids and whiteflies.
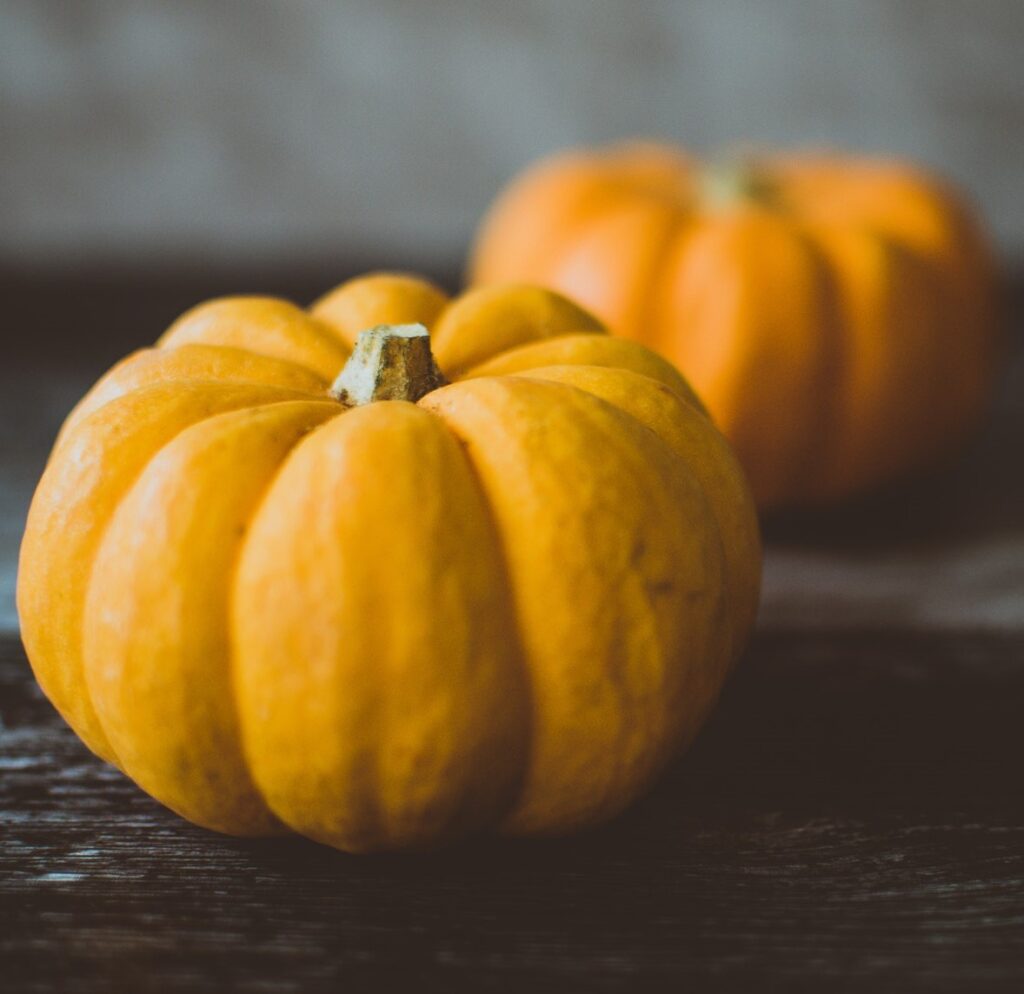
PUMPKIN
Sow: Early May through June
Sow to Harvest: 75-120 days
Pumpkins are big, greedy feeders which need full sun location and very rich soil that is well-drained and not too soggy. Mix lots of compost and aged manure into the planting site before you sow seeds or transplant.
For earlier crops or in cold regions, sow seeds indoors. Sow the flat seeds on their side, ½in (1cm) deep, and keep at 18–21°C (65–70°F).
Plant outdoor in rows or “pumpkin hills”. With hills, the soil will warm more quickly and the seeds will germinate faster. This also helps with drainage and pest control.
Plant the seeds 6-12in (15-30cm) apart 1in (2.5 cm) deep into the hills. Space hills 4-8 feet (1-2.5m) apart. Soaking your pumpkin seeds in warm water for four hours may speed up germination.
Your plants should germinate in less than a week with the right soil temperature (70°F /21°C) and emerge in 5-10 days. When the plants are 2-3in (5-7cm) tall, thin to one plant every 18-36in (45-90cm) by snipping off unwanted plants without disturbing the roots of the remaining ones.
Pumpkins need lots of space for sprawling vines. However, if your garden space is limited, no worries! Plant pumpkins at the edge of the garden and direct vine growth across the lawn or sidewalk.
A single pumpkin plant can produce between two and five pumpkins. Miniature pumpkin varieties such as Jack B. Little (also known as JBL) can produce as many as twelve pumpkins. Most small vine varieties can be trained up a trellis.
Pumpkins need lots of water. Water one inch per week. Adjust based on rainfall accordingly. Water deeply, especially during fruit set. Keep foliage and fruit dry. Dampness will make rot and other diseases more likely. Add mulch around your pumpkins to keep in moisture, suppress weeds, and discourage pests.
Remember that pumpkins are tender from planting to harvest. Control weeds with mulch. Do not overcultivate, or their very shallow roots may be damaged.
Fertilize on a regular basis. Use a high nitrogen formula in early plant growth. Fertilize when plants are about one foot tall, just before vines begin to run. Switch over to a fertilizer high in phosphorous just before the blooming period.
In general, you do not need to prune your vines. But some people will thin their plants to one or two fruits each to grow giant prize pumpkins.
Place a thin board or heavy cardboard under ripening pumpkins to avoid decay and insect damage.
Pumpkins are ripe when they turn a deep, solid colour and have a hard rind and woody stem. Harvest before a heavy frost. Carefully cut off the stem with a knife, leaving several inches of stem on the pumpkin.
Pumpkins should be cured in the sun for about 10 to 14 days to harden properly. This is a great time to display your pumpkin on the front porch!
Store your pumpkins in a well-ventilated place indoors at 10–15°C (50–60°F).
Tips:
Companion Planting: Nasturtiums protect against pumpkin and squash beetles. Oregano provides general pest protection. Calendula deters beetles and root nematodes.
BEETROOT

Sow: mid-April to late June
Sow to Harvest: 8-10 weeks
Beetroot grows best in fertile, well-drained soil. Prior to sowing, dig in well-rotted garden compost or other organic matter. Then rake in a handful per square metre/yard of any general-purpose fertiliser. You can also grow beetroot in containers.
Sow seeds outdoors from mid-April to late June at 10cm (4in) spacings, 2.5cm (1in) deep, in rows 30cm (1ft) apart. Sow small batches every two weeks from March/April to July for a succession of tender, tasty roots. Beetroot sown from June onwards can be stored for use in winter.
Water regularly and keep the area free from weeds. This reduces the likelihood of the roots becoming woody or splitting. Hoe around the plants to keep the row weed free, taking care not to damage the swelling beetroot roots.
When the seedlings are about 2.5cm (1in) high, thin out to leave one every 10cm (4in). The young beetroot leaves are fantastic in salads.
If plants aren’t growing strongly, apply high nitrogen fertiliser (30g/1oz per sq m/yd), such as sulphate of ammonia, and water in.
Beetroot can be harvested from early summer through to mid-autumn, depending on sowing time and variety.
Tips:
Beets are good companions to brassicas, bush beans, garlic, lettuce, onion family, chicory and endive. Onions protect beets against borers and cutworms.
Beets adds minerals to the soil, as beet leaves are composed of 25% magnesium.
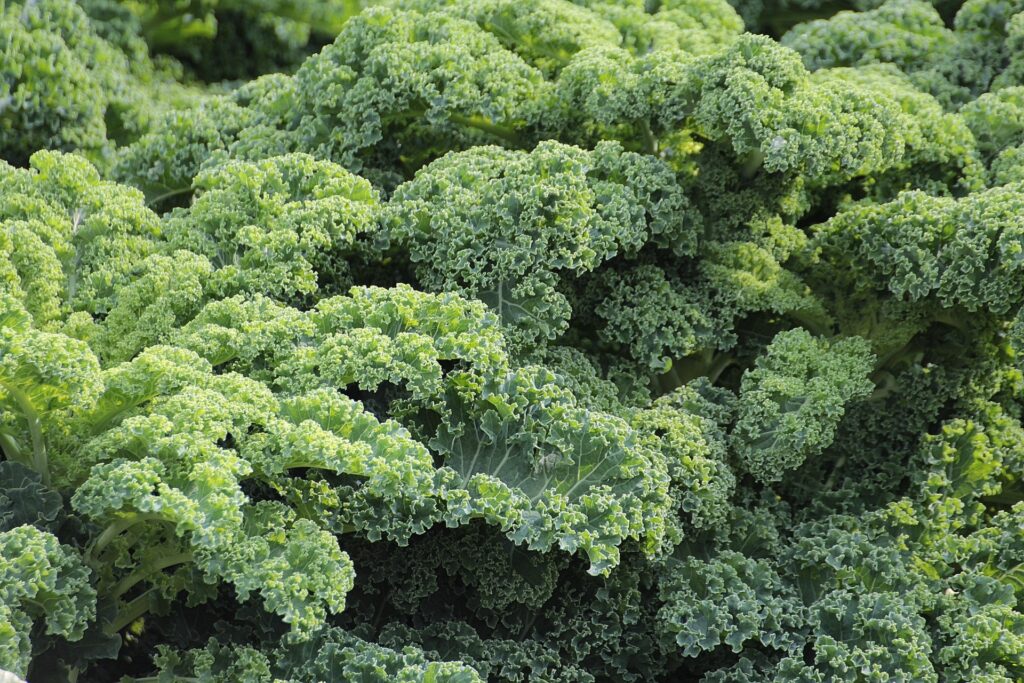
KALE
Plant: Spring: 3-5 weeks before the last frost. Fall: 6-8 weeks before the first frost.
Plant to Harvest: 55-75 days for seeds, 30-40 days for transplants.
Kale is easy to plant, and grows beautifully in the ground, raised beds and containers.
Kale grows best in full sun but will tolerate partial shade as well. Kale likes fertile soil to grow fast and produce tender leaves. Enrich the soil with compost and fertilizer before setting out the seedlings. You can also use nitrogen-rich amendments such as blood meal, cottonseed meal, or composted manure into the ground before planting.
Plant kale in spring 3-5 weeks before the last frost. Space kale 18-24in (45-60cm) apart in an area with full sun and well-drained, fertile soil with a pH of 6.5 to 6.8. The leaves will grow bigger if given a lot of space, but smaller leaves tend to be the most tender. After planting, water well.
Kale’s roots run horizontally from the central stem. Mulch with compost, finely ground leaves, weed-free hay, straw, pine needles, or finely ground bark to keep the soil cool and moist and to keep down weeds. Mulching will also help keep the leaves free of splashing soil for a clean harvest.
Harvest kale starting with the lowest leaves once they reach the ideal colour and are large enough to eat. Leave at least 4 leaves intact at each plant’s top to encourage growth. Kale leaves are sweetest in the fall, after they’ve been touched by a light frost.
Kale will produce new leaves all winter in zones 7 to 10. In climates where hard freezes are frequent, kale often survives winter with additional cold protection from thick mulch, row covers, or plastic tunnels. Overwintered plants should be removed in spring.
Tips:
Kale is a great companion plant to beets, celery, cucumbers, herbs, onions, spinach, chard, and potatoes. It isn’t happy growing next to beans, strawberries, or tomatoes.
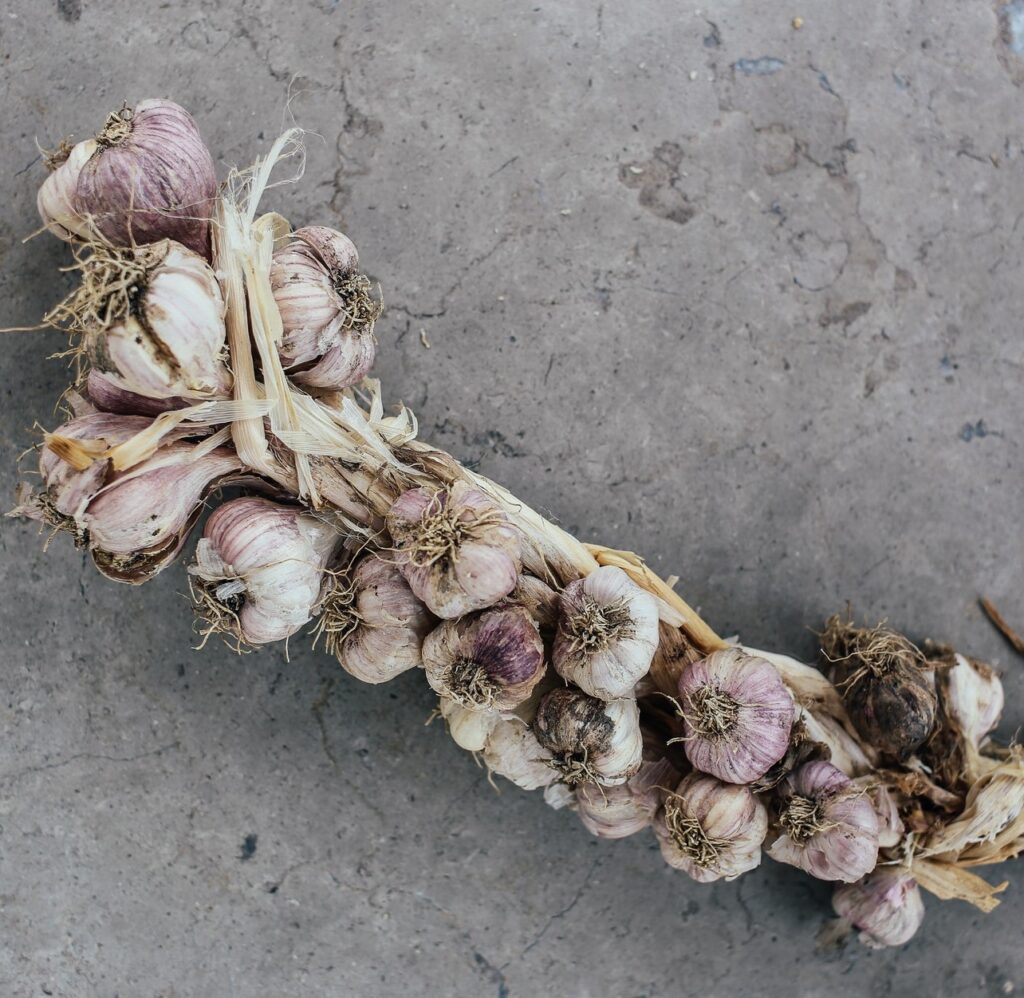
GARLIC
Plant: October (or two weeks before the first frost)
Plant to Harvest: 8-9 months
There are two main types of garlic: Softneck and Hardneck.
Hardneck varieties are extremely cold hardy so plant them if your winters are harsh. They produce “scapes” or flower stems which must be removed to encourage the bulbs to reach their full potential. The scapes are great to eat as grilled, chopped into salads or added to stir-fries. Hardnecks grow one ring of cloves around a stem, there is not a layer of cloves as there is in softneck varieties. They do not store as well or long as other varieties. Flavor is milder than softnecks.
Softneck varieties have necks that stay soft after harvest, and therefore can be braided for storage. Softnecks are less winter-hardy and especially recommended for warmer climates. They have strong, intense flavour and tend to grow bigger bulbs.
October is the most popular month to plant garlic, but depending on where you live, you could plant sooner or later. Garlic cloves should be planted at least two weeks before the first frost of the season. It takes about 8 to 9 months for a small planted garlic clove to develop into a ready-to-harvest head of garlic.
Plant in an area which will receive maximum sunlight hours. Good drainage is key. Prepare your soil by mixing in lots of good compost long before you start planting.
Select large, healthy cloves, free of disease. The larger the clove, the bigger and healthier the bulb you will get the following summer.
To plant, gently remove the outer skin from the entire bulb and separate the individual cloves, taking care not to damage them. Leave in place the thin papery skin that covers each clove.
Place cloves upright (the wide root side facing down and pointed end facing up) 4-6in (10-15cm) apart and 2in (5cm) deep. Plant in rows spaced 8-10in (20-25cm) apart.
After planting, lay down a protective mulch of straw, chopped leaves or grass clippings. In cold-winter regions the mulch should be approximately 4in (10cm) thick. Mulch will help to prevent the garlic roots from being heaved out of the ground by alternate freezing and thawing. Mulch is also useful to control the weeds.
Fertilize garlic in the early spring with a nitrogen-heavy fertilizer such as blood meal, chicken manure, or a store-bought pelleted fertilizer. Fertilize again just before the bulbs begin to swell (usually early May in most regions).
Water every 3-5 days during bulbing (mid-May through June). As mid-June approaches, reduce the watering.
Keep the weeds away. Garlic doesn’t do well with competition—it needs all available nutrients!
Harvest starting from mid-July to August depending on your region. You know when to harvest when most of the leaves turn brown.
Sample before digging up your whole crop! Carefully dig one bulb using a garden fork. The garlic is ready when the head is divided into plump cloves and the skin covering the outside of the bulbs is thick, dry and papery. If pulled too early, the bulb wrapping will be thin and disintegrate.
If left in the ground too long, the bulbs sometimes split apart. The skin may also split, which exposes the bulbs to disease and will affect their storage.
Let them cure in an airy, shady, dry spot for two weeks. You can hang them upside down on a string in bunches of 4 to 6 or you can leave them to dry on a rack with good air circulation on all sides.
Bulbs should be stored in a cool (40°F / 4°C), dark, dry place, and can be kept in the same way for several months. Don’t store in your basement if it’s moist! Do not store garlic in the refrigerator, either.
If you plan on planting garlic again next season, save some of your largest, best-formed bulbs to replant in the fall.
During the winter months you should check your stored garlic bulbs often, and promptly use any that show signs of sprouting.
Tips:
Garlic deters many pests, such as aphids, spider mites, fungus gnats, Japanese beetles, snails, and cabbage loopers. Garlic also accumulates sulfur, which is a naturally-occurring fungicide that will help protect your plants from diseases.
There are many plants that grow well next to garlic. Some include beets, dill, kale, spinach, cabbage, potatoes, roses, geraniums, marigolds, nasturtiums, all fruit trees.
The only things you should not grow alongside garlic are asparagus, beans, parsley, peas, sage.
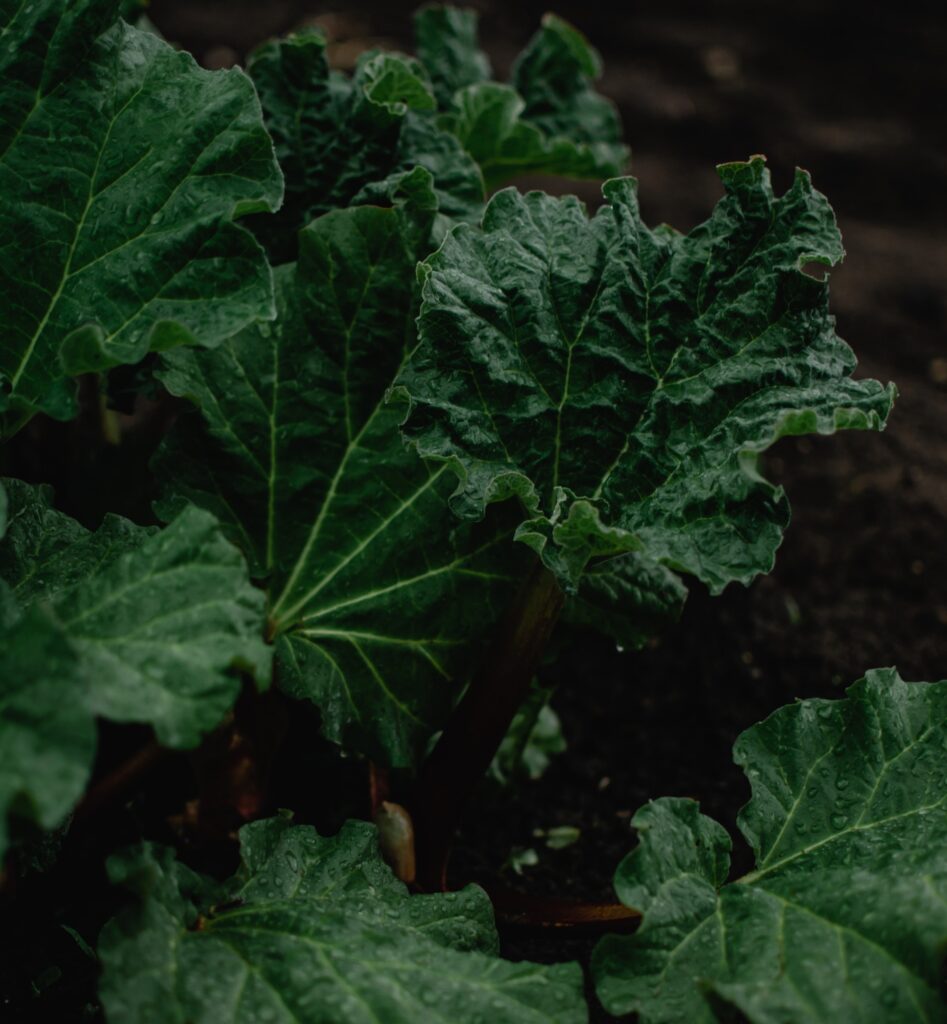
RHUBARB
Plant: late fall (November) or early spring
Plant to Harvest: harvest the second year from planting, when the stalks are 7-15in (17-40cm) long.
Rhubarb is an attractive hardy perennial with large leaves and pink, red or greenish leaf stalks that are used as a dessert, often in pies and crumbles. Rhubarb is extremely easy to grow.
Rhubarb needs an open, sunny site with moist, but free-draining soil, as it dislikes being waterlogged in winter. Avoid planting in sites that are particularly prone to late frosts, as the young stems may be damaged.
Rhubarb can be grown from seed, but it’s more common to plant dormant crowns between autumn and spring. If you buy plants in pots in active growth you can plant them at any time of year, but it’s best to avoid planting in hot dry weather.
Prepare the planting site by digging in well-rotted manure. Then dig a planting hole and position the plant so the tip of the crown is just visible above the soil. If planting more than one, space them 75–90cm (30–36in) apart. Water during prolonged dry periods in summer. Growth will slow down if conditions are too hot and dry. To boost growth, apply a general fertiliser in spring or summer.
Rhubarb can also be planted in very large pots, at least 50cm (20in) deep and wide. Plants in containers need regular watering throughout the growing season, as they dry out much faster.
With newly planted rhubarb, resist the temptation to harvest any stems in the first year, as this will reduce the plant’s vigour. The following year, pick just a few stems. After that, the plant should be well established and can be harvested normally.
To harvest, hold the stalk at the base and ease it out of the ground – try to avoid snapping it off. Always leave at least 2 stalks per plant to ensure continued production. You may have a bountiful harvest for up to 20 years without having to replace your rhubarb plants.
Although the stems remain edible and tasty through summer, it’s best to stop harvesting by June, or at least only take a few stalks after then, so you don’t over-harvest and weaken the plant.
Remove the whole flower stalk as soon as it appears, to prevent it weakening the plant.
Allow the foliage to die back naturally in autumn, then cut away the old leaves to expose the growing points to winter cold. Rhubarb requires seven to nine weeks of cold weather below 3°C (37°F), depending on the cultivar. There is no harm in adding rhubarb leaves to the compost heap, as the poisonous oxalic acid contained in them breaks down during decomposition.
You can divide established clumps of rhubarb every five years or so, especially if they have become overcrowded or growth is weak. This will give you vigorous new plants for your own garden or to share with friends. The resulting plants are exact clones of the parent.
Lift the dormant crown between autumn and early spring – ideally in November. Use a spade to divide the crown into several smaller sections, each with a portion of the rhizome (thickened root) and at least one growing point or bud. Sections from the outer part are better than the centre of old plants. Discard any old or decayed parts of the crown. Replant straight away or wrap in damp sacking until ready to plant.
In the fall, remove all plant debris. Once your ground freezes, it’s best to cover rhubarb with 2-4 in (5-10cm) of an organic mulch, preferably well-rotted compost. By adding nitrogen to the soil, you’re preparing the rhubarb plants for a good spring season.
Tips:
Cauliflower, beans, kale, broccoli, and garlic are good companion plants for rhubarb. Meanwhile, melon, black walnut, cucumbera nd pumpkin do not go well with rhubarb in a garden.
Earlier harvests of sweeter, tender, pale stems can be produced by covering rhubarb plants with a forcing jar or bin in late winter, so the stalks form in the dark. They can be ready to harvest as early as March, several weeks before plants left to grow normally.